How to change the Password never expires attribute and set a password expiration date using PowerShell

Reference:

https://www.manageengine.com/products/self-service-password/powershell/how-to-change-password-never-expires-attribute-and-expiration-date.html

Set the Password never expires attribute

To set the Password never expires attribute for AD users:

$User = (Read-Host -Prompt “Username")
Set-ADUser -Identity $User -PasswordNeverExpires $true

Set the password expiration date

You can extend the validity of an AD password by setting the pwdlastset attribute to -1, which sets the value of the attribute to the current date and time.

$Username = (Read-Host -Prompt “Username")
$User = Get-ADUser $Username -Properties pwdlastset
$User.pwdlastset = 0
Set-ADUser -Instance $User
$User.pwdlastset = -1
Set-ADUser -Instance $User

Migrate from Active Directory 2012 R2 to Active Directory 2019 (PowerShell Guide)

Reference:

http://www.rebeladmin.com/2019/01/step-step-guide-migrate-active-directory-2012-r2-active-directory-2019-powershell-guide/

  • Install AD DS Role
    Install-WindowsFeature –Name AD-Domain-Services -IncludeManagementTools
  • Configure the new server as additional domain controller
    Install-ADDSDomainController
    -CreateDnsDelegation:$false
    -NoGlobalCatalog:$true
    -InstallDns:$true
    -DomainName “therebeladmin.com"
    -SiteName “Default-First-Site-Name"
    -ReplicationSourceDC “REBEL-DC2012.therebeladmin.com"
    -DatabasePath “C:\Windows\NTDS"
    -LogPath “C:\Windows\NTDS"
    -NoRebootOnCompletion:$true
    -SysvolPath “C:\Windows\SYSVOL"
    -Force:$true
  • Migrate Application and Server Roles from the Existing Domain Controllers.
  • Migrate FSMO roles to new Domain Controllers
    Move-ADDirectoryServerOperationMasterRole -Identity REBEL-DC2019 -OperationMasterRole SchemaMaster, DomainNamingMaster, PDCEmulator, RIDMaster, InfrastructureMaster
  • Verify FSMO
    Netdom query fsmo
  • Add New Domain controllers to the Existing Monitoring system
  • Add New Domain controllers to the Existing DR Solution
  • Decommission old domain controllers
    Uninstall-ADDSDomainController -DemoteOperationMasterRole -RemoveApplicationPartition
  • Raise the Domain and Forest Functional level
    Set-ADDomainMode –identity therebeladmin.com -DomainMode Windows2016Domain

    Set-ADForestMode -Identity therebeladmin.com -ForestMode Windows2016Forest


Check AD DS Status
Get-Service adws,kdc,netlogon,dns

List out the domain controllers
Get-ADDomainController -Filter * |  Format-Table Name, IPv4Address, Site

Verify Domain and Forest Functional Level
Get-ADDomain | fl Name,DomainMode

Get-ADForest | fl Name,ForestMode

Step-By-Step: Setting up Active Directory in Windows Server 2016

Reference:

https://blogs.technet.microsoft.com/canitpro/2017/02/22/step-by-step-setting-up-active-directory-in-windows-server-2016/

1) Once Active directory setup on the server, it also going to act as DNS server. There for change the DNS settings in network interface and set the server IP address (or local host IP 127.0.0.1) as the primary DNS server.

2016AD1

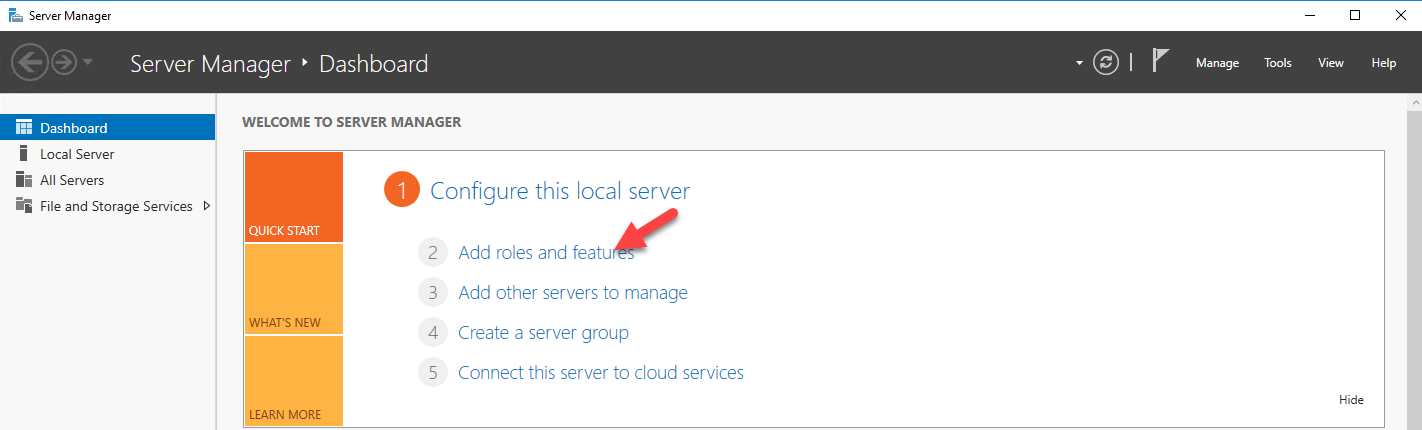
2) Then open the server manager. Go to PowerShell (as administrator) and type ServerManager.exe and press enter.

2016AD2

3) Then on server manager click on add roles and features

2016AD3

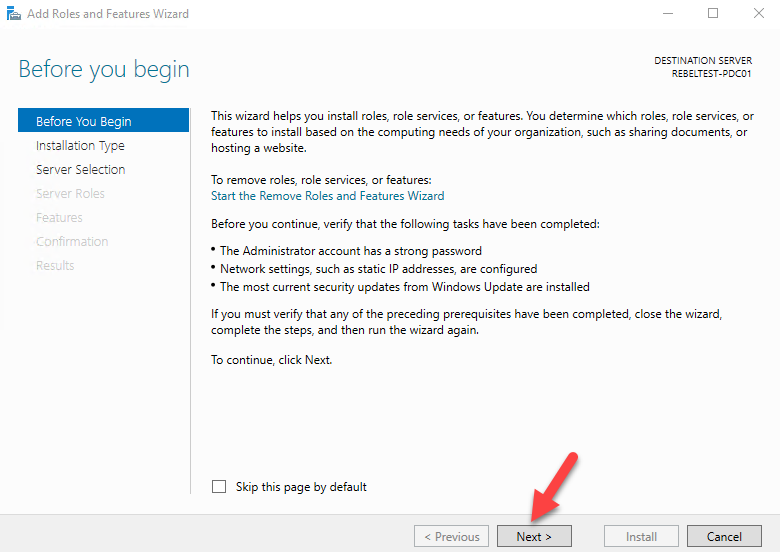
4) Then it opens the add roles and features wizard. Click on next to proceed.

2016AD4

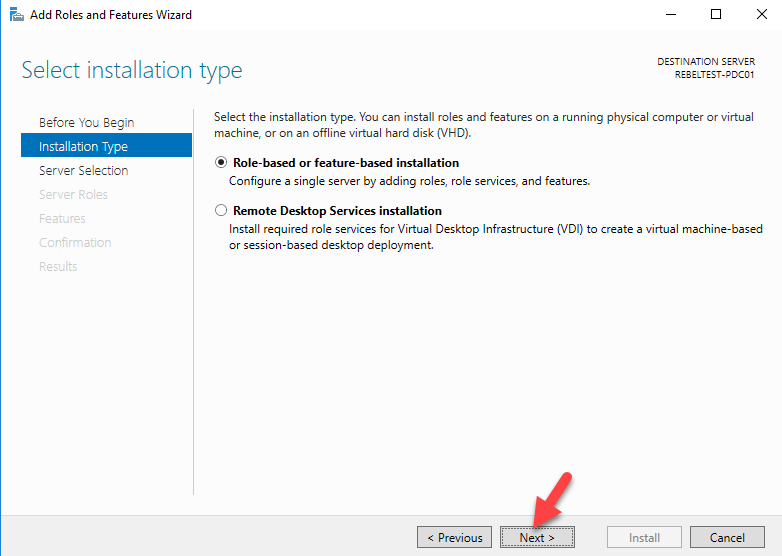
5) Then in next window keep the default and click next

2016AD5

6) Since its going to be local server, in next window keep the default selection.

2016AD6

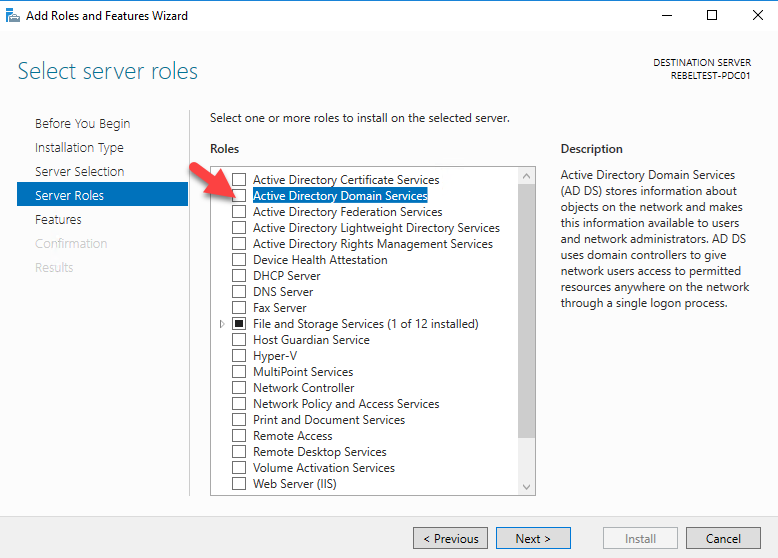
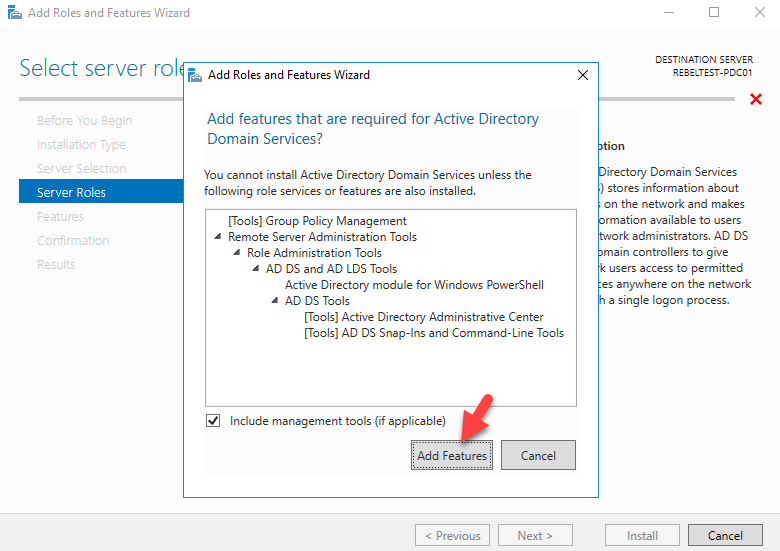
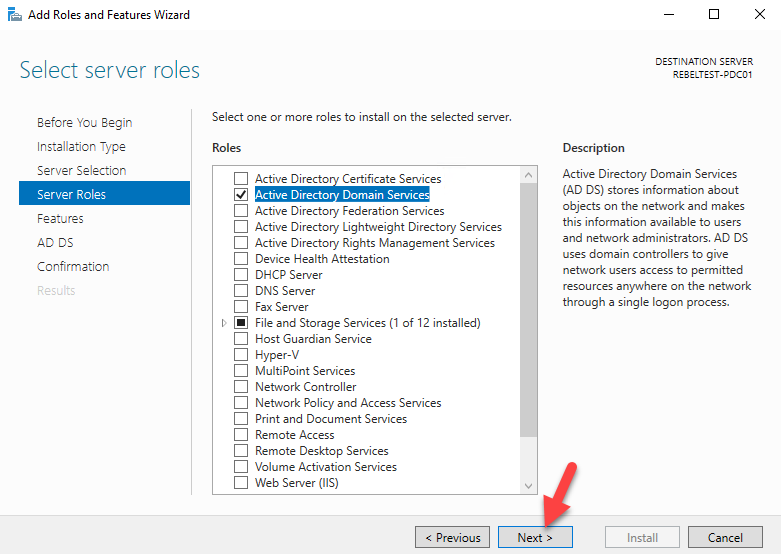
7) In next window from the roles put tick box for active directory domain services. Then it will prompt to show you what are the associated features for the role. Click on add features to add those. Then click next to continue.

2016AD7

2016AD8

2016AD9

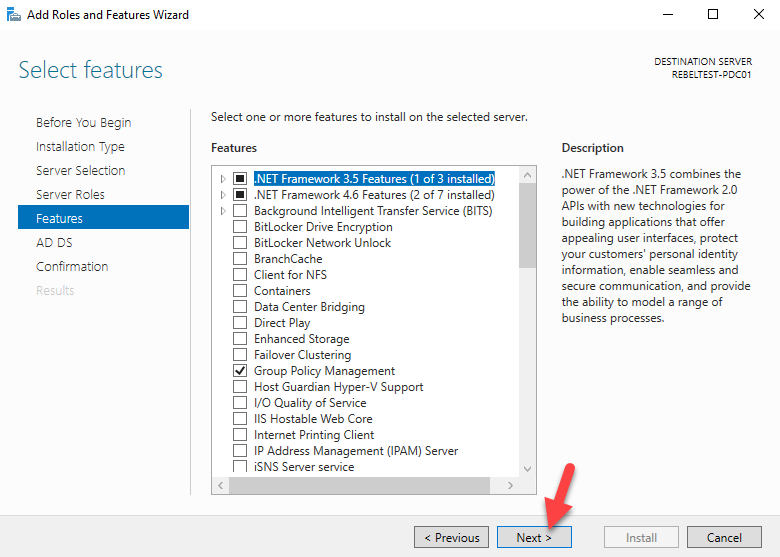
8) The features page, keep it default and click on next to proceed.

2016AD10

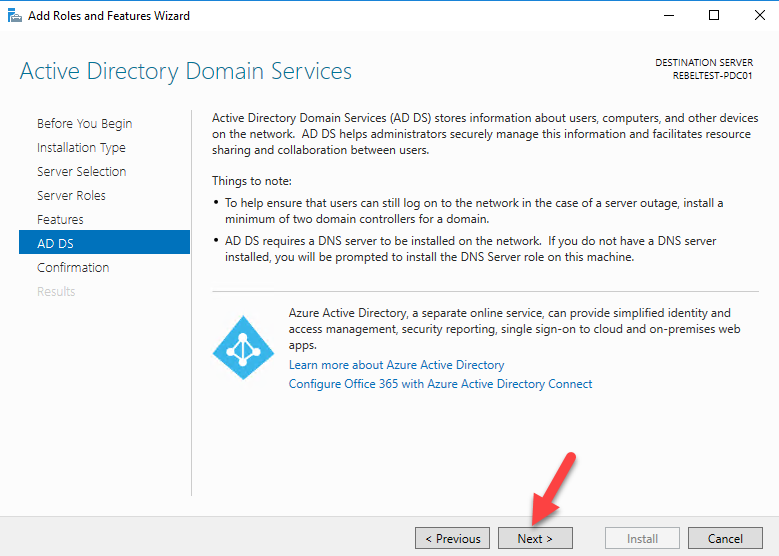
9) In next windows it gives brief description about AD DS service. Click next to proceed.

2016AD11

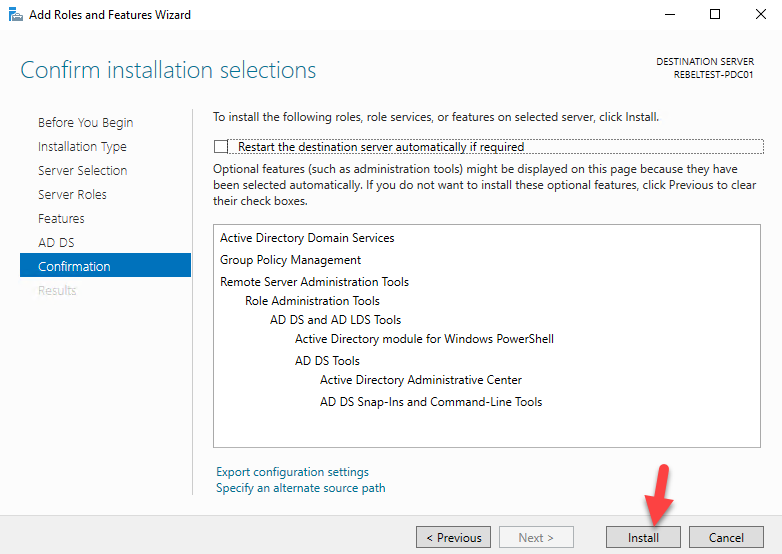
10) Then it will give the confirmation about install, click on install to start the role installation process.

2016AD12

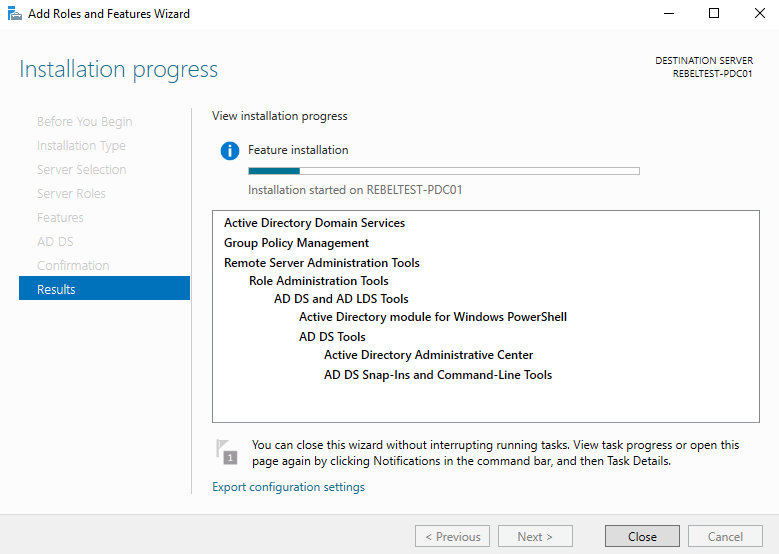
11) Once done, it will start the installation process

2016AD13

12) Once installation completes, click on option promote this server to a domain controller.

2016AD14

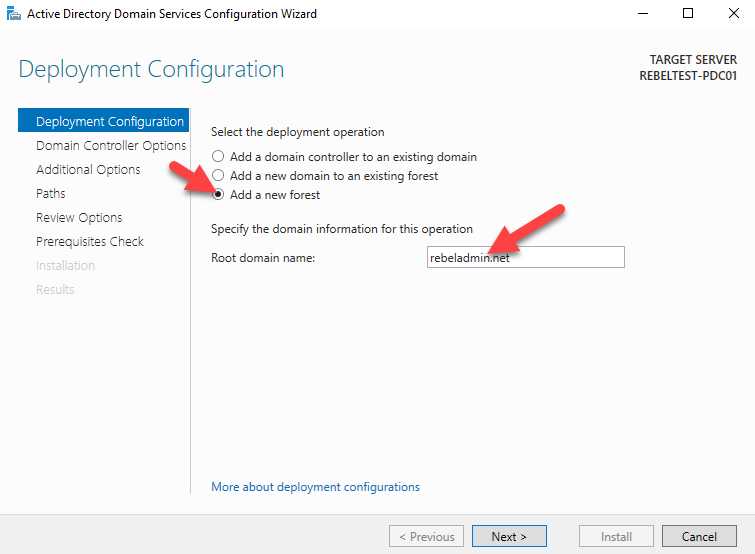
13) Then it will open the active directory configuration wizard. In my demo I am going to setup new forest. But if you adding this to existing domain you can choose relevant option. (I am going to write separate article to cover how you can upgrade from older version of Active Directory). Select the option to add new forest and type FQDN for the domain. Then click next.

2016AD15

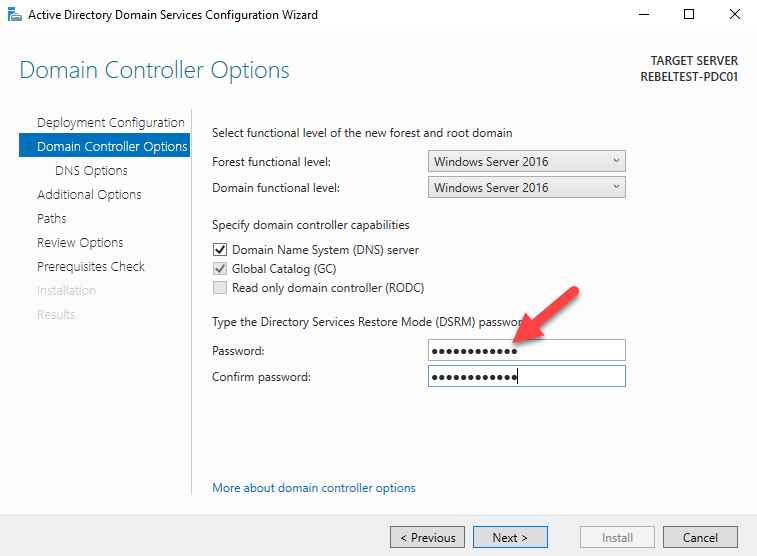
14) In next page you can select the domain and forest functional levels. I am going to set it up with latest. Then type a password for DSRM. Then click next

2016AD16

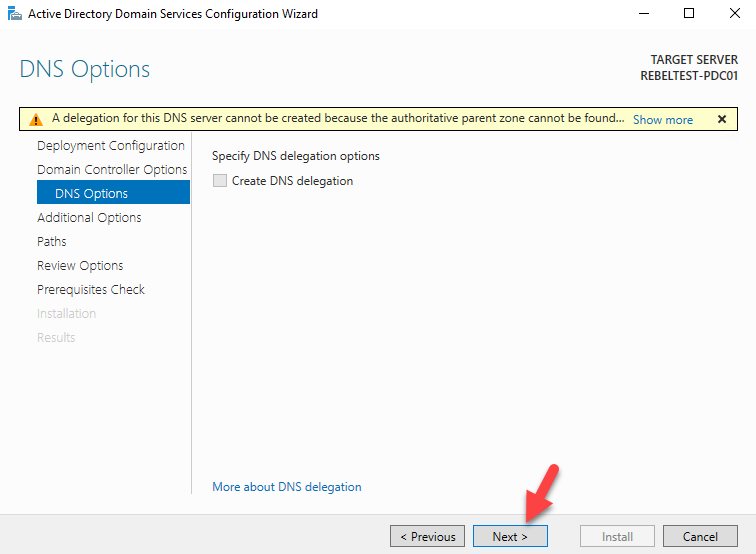
15) For the DNS options, this going to be the first DNS server in new forest. So no need any modifications. Click next to proceed.

2016AD17

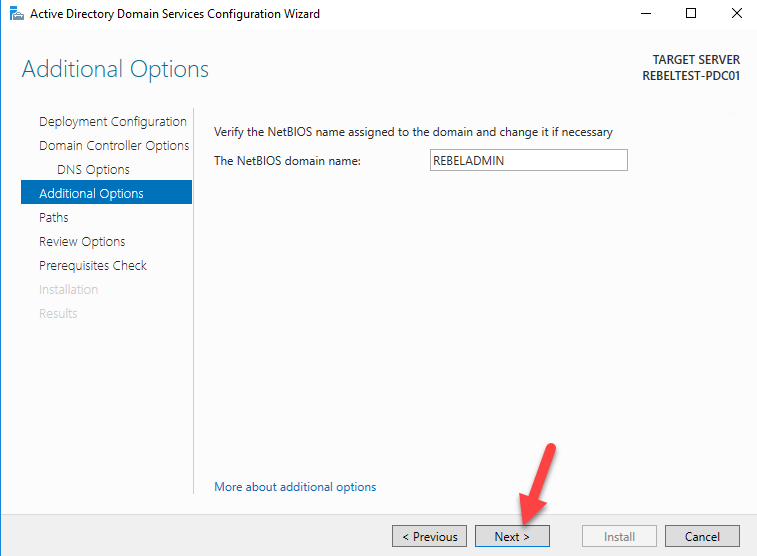
16) For the NETBIOS name keep the default and click next 

2016AD18

17) Next page is to define the NTDS, SYSVOL and LOG file folders. You can keep default or define different path for these. In demo I will be keeping default. Once changes are done, click next to continue

2016AD19

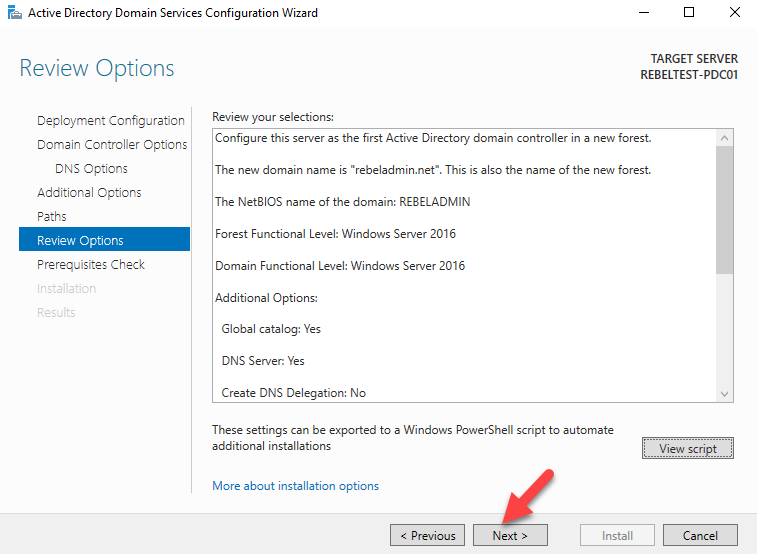
18) Next page will give option to review the configuration changes. If everything okay you can click next to proceed or otherwise can go back and change the settings.

2016AD20

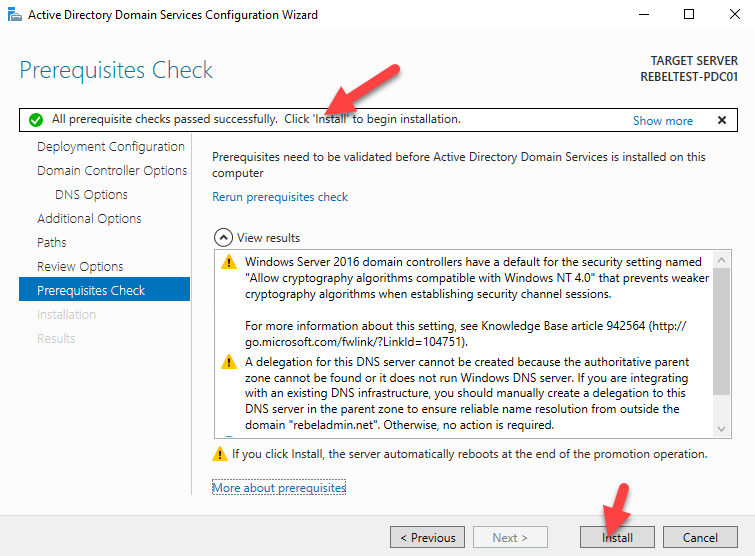
19) In next windows it will do prerequisite check. If it’s all good it will enable option to install. Click on install to begin installation process.

2016AD21

20) Then it will start the installation process.

2016AD22

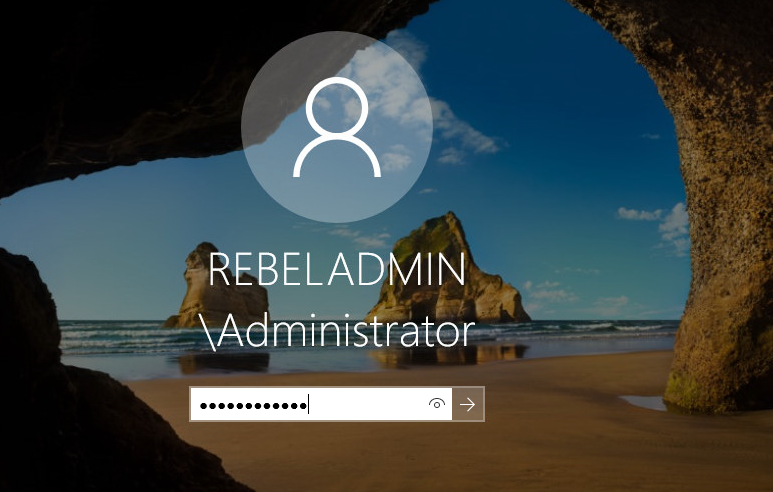
21) After the installation system will restart automatically. Once it comes back log in to the server as domain admin.

2016AD23

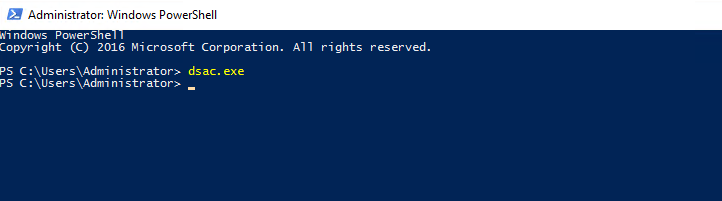
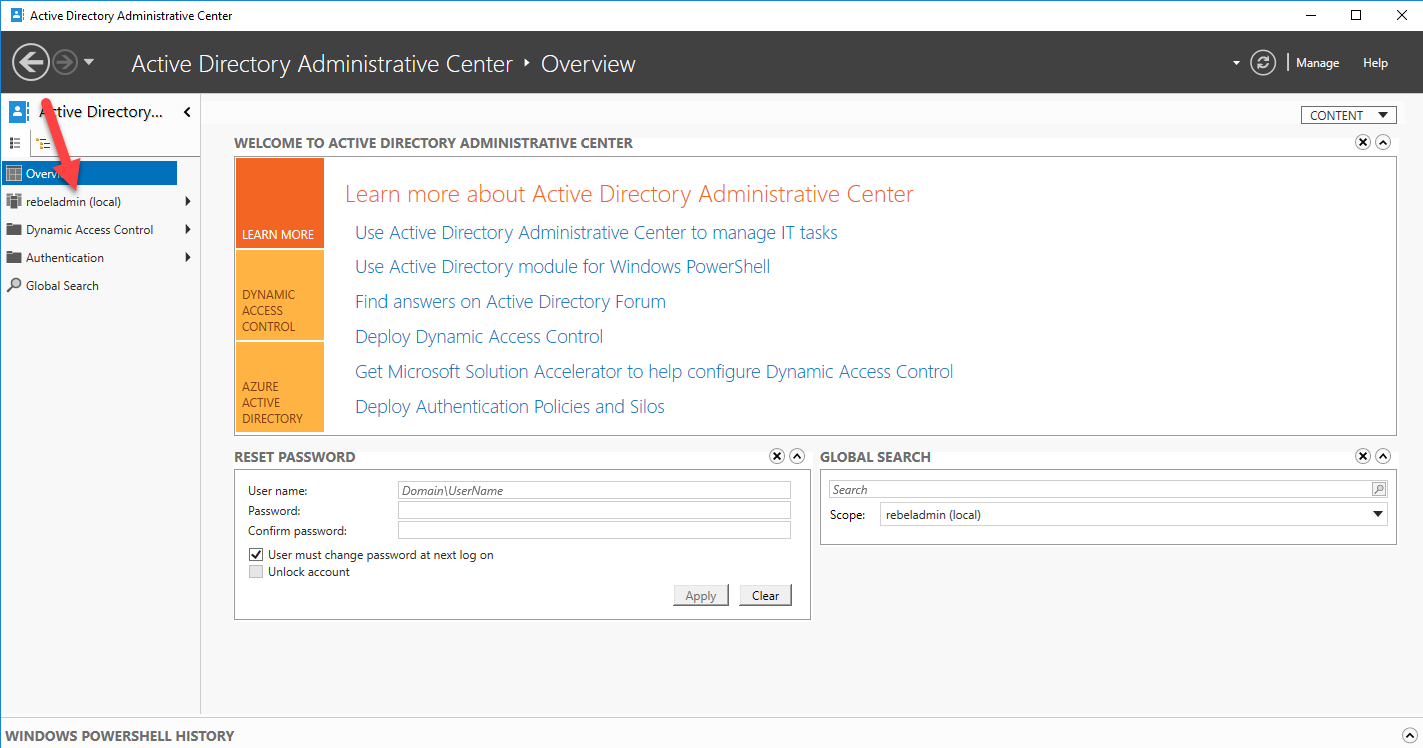
22) Once log in open the powershell (as administrator) and type dsac.exe and press enter. It will open up the active directory administrative center. There you can start managing the resources.

2016AD24

2016AD25

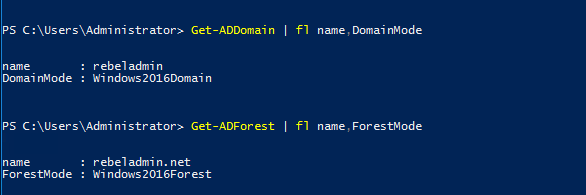
23) Also you can use Get-ADDomain | fl Name,DomainMode and Get-ADForest | fl Name,ForestMode from powershell to confirm domain and forest functional levels

2016AD26

Step-By-Step: Setting Up Active Directory Sites, Subnets & Site-Links

Reference:

https://blogs.technet.microsoft.com/canitpro/2015/03/03/step-by-step-setting-up-active-directory-sites-subnets-site-links/

Active_Directory_Sites_Subnets_001

Step 1: Creating a new site

  1. Navigate to Server Manager > Tools > Active Directory Sites and Services
  2. In the Active Directory Sites and Service window, right-click Sites and select New Site

    Active_Directory_Sites_Subnets_002

  3. Enter SiteA in the Name: box
  4. Select the DEFAULTIPSITELINK and click OK

    Active_Directory_Sites_Subnets_003

  5.  Click OK to complete the site creation
  6. Repeat steps 1 to 5 and create SiteB. Once completed, you should see the following:

    Active_Directory_Sites_Subnets_004

Step 2: Creating Subnets

  1. In the Active Directory Sites and Services MMC, right-click Subnets and select New Subnet…

    Active_Directory_Sites_Subnets_005

  2. In the New Object – subnet window, type 192.168.148.0/24
  3. In the Select a site object for this prefix option select SiteA and click OK

    Active_Directory_Sites_Subnets_006

  4. Repeat steps 1 to 3 and use prefex 10.10.10.0/24 assigned to SiteB

Step 3: Creating Site Links

  1. In the Active Directory Sites and Services MMC,  right-click Inter-Site Transports > IP and then click New Site Link

    Active_Directory_Sites_Subnets_007

  2. In the New Object – subnet window, enter a desired name for the link, select both SiteA and SiteB, and click add

    Active_Directory_Sites_Subnets_008

  3. Click OK to continue
  4. The link is then created link with the default values however it can be optimized. Right-click on the link and select properties

    Active_Directory_Sites_Subnets_009

  5. In the SiteA-SiteB Dedicated Link Properties window, the cost defines the links assigned bandwidth. Further details in regards to cost can be found here

    Active_Directory_Sites_Subnets_010

  6. Replication changes can also be defined between sites. To accomplish this, click on Change Schedule
  7. Define a custom schedule and click OK

    Active_Directory_Sites_Subnets_011

  8.  Click OK to apply the changes


Step 4: Moving the Domain controllers to the newly created sites

  1. In the Active Directory Sites and Services MMC, navigate to Default-First-Site-Name > Servers
  2. Right-click on the Domain controller required to move and select Move…

    Active_Directory_Sites_Subnets_012

  3. In the Move Server window, select SiteA which will be site the Domain Controller will be moving to and click OK

    Active_Directory_Sites_Subnets_013

  4. Repeat steps 1 to 3 to move SRV1 to SiteB

    Active_Directory_Sites_Subnets_014

AD Replicate

Reference:

https://blogs.msdn.microsoft.com/servergeeks/2014/07/12/ad-replication-process-overview/

Active Directory (AD) is a multi-master directory, meaning each directory services server—referred to as a domain controller—contains a fully readable and writeable copy of the directory services database.

Because all domain controllers can accept changes to the database, some method is needed to replicate those changes to other domain controllers, ensuring a consistent
database across all domain controllers.

This scheme is referred to as AD replication.


在WordPress.com寫網誌.

向上 ↑